

Getting into digital format is much easier than The Great Film Project of 2015 was.
First, I tried "cassette tape to MP3" conversion kits you can buy on amazon. I'm not going to link to any of them because they were terrible. Ultimately, the kits are made to be inexpensive and so the tape players (without fail, if you read the reviews) are crap. They play at variable speeds, giving the resulting audio a warble. One I tried even had a steady 'thump thump thump' behind the audio. if you're working with genealogy stuff, you want a high quality recording.
So, failing an out-of-the-box solution, I pieced together a really cheap (under $40) and easy way to do it myself, which is what I'm giving you here.
You will need :
- a computer with a free USB port
- some very basic computer skills
- A tape player with a headphone jack. Jensen makes a solid tape player (affiliate link). There are others but Jensen is a brand that's been around forever, the player is reasonably priced, no frills, and works well. Under $30.
;- 3.5mm male to male auxiliary cable (affiliate link). That's a fancy way of saying a standard headphone plug (the outty dooha, in technical jargon) to a standard mic plug cable. Under $5.
this fancy doo-dad (affiliate link) - an external stereo to USB adapter. It has a mic jack on one side and a USB male adapter on the other. About $5.


Ok. Once you have it all in hand, plug one end of the auxiliary cable into the headphone jack of the tape player and the other end into the mic jack of the stereo usb adapter. Then plug the USB end of the adapter into your computer. Windows will automatically add is as a 'usb mic' without any drivers. The hard part is over!
Finally, you will need something on your computer to listen for the input and record it. For that, download audacity - whichever version fits your setup. It's free, doesn't install other freeware and is relatively easy to use. In fact, the kits I tried, both came with a copy of this as the software component.
Install it (double click the file you downloaded and click next a few times). Once it's installed, open it, click 'edit' and then 'preferences'. You'll get a screen that looks like this :

The very first item on the left hand side says 'devices'. When that is highlighted, on the right hand side, you'll see the heading 'recording' and under that, a menu option that says 'device' with a drop down to the right of it. Your USB mic might already be selected. If it's not, click the drop down, select your USB mic and click 'ok'. That pop up will go away.
Up at the top of the audacity screen, you'll see lots of buttons like this :
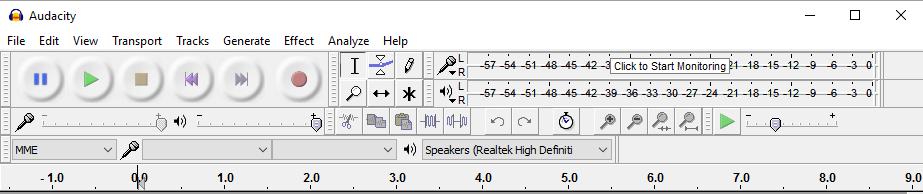
Never fear. You can ignore all of those except these :

They should be mostly familiar. Pause, play, stop, back to the beginning, go to the end, record. Under them, you have the mic volume and the playback volume. Turn the mic volume about halfway up.
Put your tape into the tape player, rewind it to where you want to start. Turn it's volume to about halfway as well. Click the record button in audacity and then press play on the tap player.
You will not hear anything over your speakers but you should see, in audacity, a blue line that squiggles up and down with the audio it's hearing. As long as the blue line is fluctuating and is not consistently smooshed against the top or bottom of it's box, you're fine. If it is consistently smooshed against the top or bottom, you'll want to adjust one or both recording volumes down. You can record a little, stop and play it back on your computer a few times to get it just right if you need to.
Leave it alone for the full length of the tape. You can use your computer for other things while it's recording. Audacity will only record from the input you selected (the usb mic) not from other sounds in the room or on your computer.
Let the tape play all the way out. Click stop in audacity, flip the tape over, click record in audacity and push the play button on your tape recorder. When the tap is done, click stop in audacity again.
Alternatively, you can save side one as one file and then save side two as a second file. To do so, when side one is over, do the following instructions (next paragraph) and then repeat the whole process of playing, recording, stopping and saving with side two of the tape.
You can save that file in audacity format, which will allow you to tweak it a bit, should you need to or feel so inclined. Otherwise, in order to export the file into a format that you can listen to on other devices, click 'file' and 'export'. In the 'save as type' dropdown, select 'mp3' and save it to wherever you want. There are some more advanced options that the audacity online manual does a great job of explaining.
Photo : Cassette tape | Public Domain
No comments:
Post a Comment